|
Do you have solar powered yard lights that don’t work anymore? A Bluetooth speaker or an electric toothbrush that won’t hold a charge? Are you finally ready to part with that musical birthday card, even if it is from your favorite aunt?
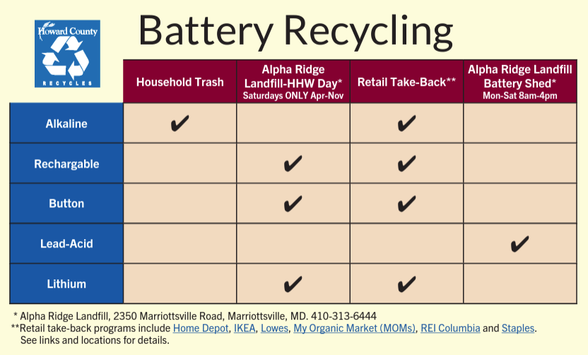
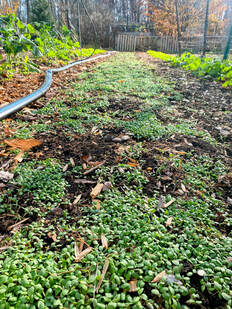
What these all have in common is that they rely on batteries of some type. Sometimes they are obvious, and sometimes they are cleverly concealed. And it goes without saying that no battery can last forever. When it comes time to either rejuvenate the device or dispose of it, in all cases it is a good idea to remove the old battery and dispose of it responsibly, as indicated in this chart from the Howard County Bureau of Environmental Services. Note that only alkaline batteries should be disposed of in your household trash! Because all other batteries contain elements that can either be recycled or need to be disposed of as hazardous waste, they should be taken to a recycling center such as the Alpha Ridge Landfill, or one of several local retail establishments, including Home Depot, IKEA, Lowes, My Organic Market (MOMs), REI Columbia and Staples. And if you aren’t sure how to get to your battery, or what you need to replace it, that’s where your friendly neighborhood Repair Café can help! One other important tip: If you have a battery powered device that hasn’t been used in a while, especially with alkaline batteries, it is a good idea to remove the batteries. The damage caused by leaking batteries is one of the most common problems that we see in the Repair Café, and it can be one of the hardest to deal with. Thinking about cover cropping this fall? Prior to seed sowing, the area must first be prepped by clearing it of weeds. Proper mechanics for the repetitive motions of weeding can help to improve endurance, prevent overuse injuries, and decrease post-activity muscle soreness. Additionally, changing positions every 15-20 minutes and taking frequent rest breaks are also beneficial for these reasons. Remember to always warm up prior to doing yard work, particularly when it is cold outside. If you have healthy knees, consider weeding in a quadruped position. While on all fours, engage your abdominal muscles by drawing your belly button towards your spine. One hand will remain on the ground stacked under your shoulder while you use the other arm to pull weeds. The multiple points of contact on the ground with your knees, feet, and hand provide good stability while the quadruped position keeps the spine in a straight position. Another technique is the tall kneel position, with one knee up and one knee down. This position also enables you to get close to the weeds without bending or reaching. Keep one leg forward with your foot flat on the ground and the other leg positioned so your knee is directly under your hip. Weed in the space near your front leg, maintaining a straight spine. If using either kneeling position, place a foam pad under your knees to protect your joints. If your knees cannot tolerate loading in the above positions, consider the use of a gardening bench. This enables you to stay low to the ground, close to where you are working. Keep your legs wide enough apart to enable the use of a hip hinging technique to prevent rounding of your lower back as you reach for the weeds. Position the bench in the direction you are pulling the weeds to prevent twisting of the spine. Minimize strain on the forearm musculature and wrists when pulling weeds by keeping your wrist in a neutral position. Rely on the shoulders for the pulling motion instead of bending the wrist upwards. The use of ergonomic tools with wide grips and good padding reduces compressive forces on the wrist and hand tendons. Likewise, properly fitting gardening gloves enable better control when handling tools and materials. This can also help prevent over-gripping which quickly fatigues the smaller hand muscles. AuthorKaryn DuLaney, PT, DPT, is a physical therapist who has practiced in outpatient orthopedics for almost 2 decades. She enjoys helping patients achieve their personal goals and maintain a healthy, active lifestyle. An avid outdoor enthusiast and competitor/participant in various adventure sports, she is passionate about helping others explore outdoor activities for the mental and physical health benefits that come with them. Karyn co-founded the Community Gear Closet, which lends outdoor gear so others can have opportunities for their own outdoor adventures. Dear Farm Fam, This Fall Justin, our Farm Manager, and I have decided it was time to give cover cropping in our growing spaces an earnest effort. Since we are both new in our farming journeys this was the first time either of us had scaled up cover cropping practices beyond a small garden bed or two and so we are excited for what we learn this year. So what is cover cropping? Great question! Cover cropping is a practice to keep your soil health intact by using plants as a protective layer over your soils. There are many plants that growers choose to act as cover crops but they often share some common characteristics; quick to mature, ability to fix nitrogen into the soil, easy to terminate and fold into your soils, etc. Cool! But why should I cover crop? I’m glad you asked. There are many different reasons folks choose to use cover crops but chief among them is to retain soil and water. Bare soil that is exposed to the elements is more likely to get washed or blown away which negatively impacts both farmers and the environment. As a wonderful farmer once told me, soil and water are like a farmer’s bank account. Cover crops are an investment to increase your bank account and can:
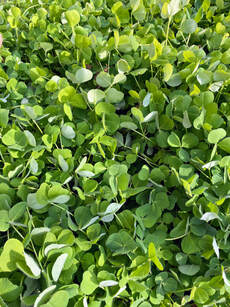
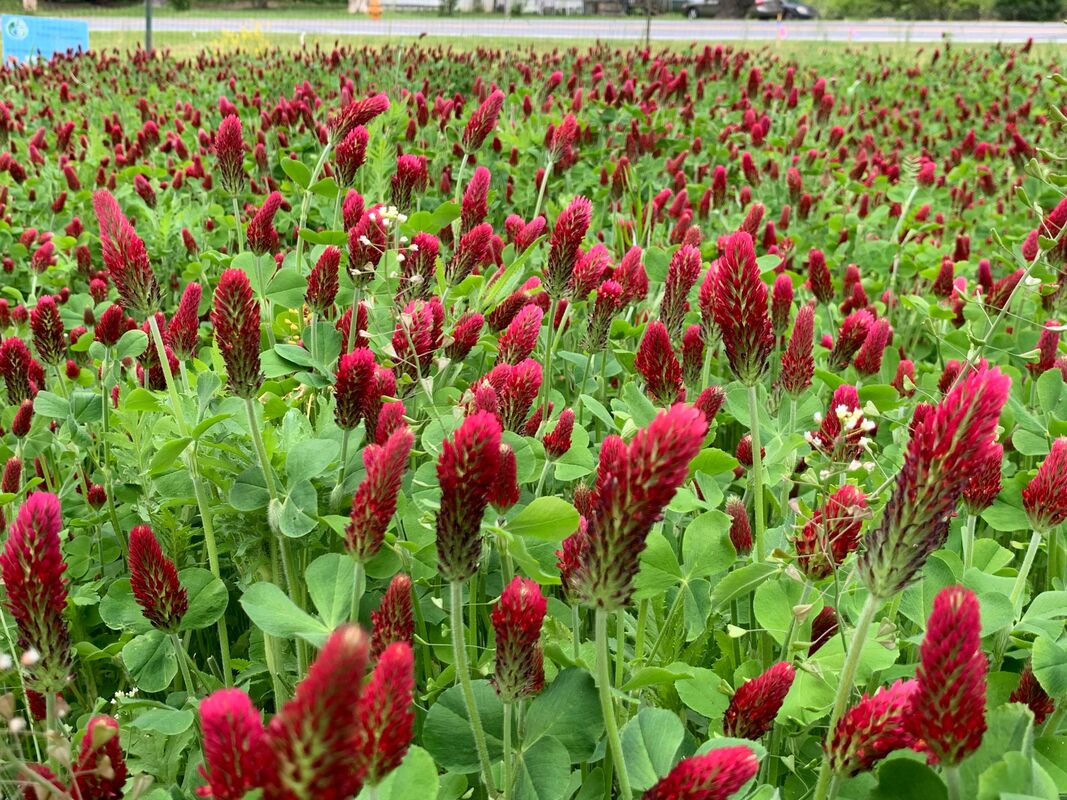
By just getting started! We’ve all felt what it’s like to start a new endeavor without feeling like you have all the information and that can be scary. But as a farmer if you give into that fear you might let your window slip by and never get around to actually growing anything! Now this doesn’t mean that you should throw caution to the wind and start tossing seeds willy nilly; do your research, find a crop that fits your space, tools, and goals, BUT don’t let not being 100% certain stop you from trying something new. If you’re limited by space and machine power like we are at Freetown your best option will likely be crimson clover. It is a nitrogen fixing crop that will feed your soils with nutrients and is easy to terminate (aka mow down) when you are ready to grow again.
If you’re interested in learning more about our cover cropping endeavor at Freetown Farm make sure to stop by during one of our volunteer shifts to chat with Justin or myself and get an update on how things have progressed. Ever Growing, Simon |
AuthorSThe Community Ecology Institute co-authors the material on this blog with the support of several team members. Categories
All
Archives
July 2024
|


 RSS Feed
